25 minute read · April 3, 2023
3 Ways to Convert a Delta Lake Table Into an Apache Iceberg Table
· Head of DevRel, Dremio

What’s a Table Format?
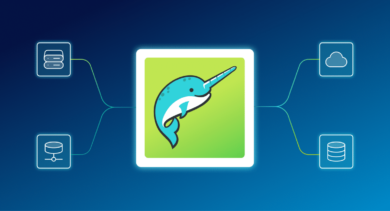
One of the significant trends in data architecture is the idea of the data lakehouse, which combines the benefits of the data lake and the data warehouse, as exemplified by the following image:

The centerpiece of this architecture is the table format, a metadata layer on top of your data lake that enables tooling to treat your data lake storage like a database with ACID transactions, high performance, time travel, and more. In the past, I’ve discussed the differences between the main three table formats: Apache Iceberg, Apache Hudi, and Delta Lake. I’ve also discussed how you can migrate Apache Hive tables to Apache Iceberg and shared best practices, along with a hands-on exercise.
In this article, I will provide guidance on how to migrate from a Delta Lake-based data lakehouse to an Apache Iceberg-based one. Scott Teal recently published this article on Delta Lake to Iceberg migration, and I’ll touch on many of the techniques in this article along with a few other avenues and considerations.
Why Migrate?
There are many reasons you may want to migrate from Delta Lake to Iceberg:
You no longer use Databricks
The most significant benefits of Delta Lake often stem from the support for the format on the Databricks platform, so if you are not using Databricks a lot of the platform benefits like auto-optimize are no longer available. Outside the Databricks platform, several platforms give Apache Iceberg first-class support, making it a compelling option when Databricks is not part of your architecture. Keep in mind, it is possible to use Apache Iceberg when using Databricks which can help to prevent migration friction if you leave the platform in the future.
To enjoy the benefits of partition evolution
Apache Iceberg is the only one of the three table formats that has the ability to change your partition scheme without having to rewrite your entire table. In a world where data is constantly evolving this can be a nice feature to have at your disposal.
To enjoy the benefits of Iceberg’s compatibility mode on object storage
Apache Iceberg is the only one of the three table formats to completely decouple from Apache Hive’s dependency on the physical layout of the files. This helps prevent prefix throttling on object storage services, improving performance when you have a lot of files in a particular table partition.
To enjoy the open platform and community
Despite being “open source,” the core Delta Lake format, for better or for worse, is still under the primary influence of Databricks. This doesn’t say anything about the performance or functionality of the format but does present an ecosystem risk that you may not want to expose the majority of your data to. Apache Iceberg has broad and transparent community development and adoption and is a great format to serve as the base for your data infrastructure, even if you may want some of your data in Delta Lake to enjoy Databricks’ ML tools.
Two Migration Paradigms
When it comes to migration from any source to Iceberg there are essentially two main approaches:
In-place migration
The goal of this approach is to repurpose the files from the previous format into the new format to reduce the amount of data that needs to be rewritten. This approach results in taking the existing Parquet files from a Hive, Hudi, or Delta Lake table and registering them with a new or existing Iceberg table. The end result is that you only write new metadata that includes the existing files.
| PROS | CONS |
| Fewer files have to be written | The new table schema must match the previous (can’t change schema during migration) |
| Faster (less writing means less time) | |
| Cheaper (less writing means less compute time/costs) |
Shadow migration
In this approach you rewrite the table often using a CTAS (CREATE TABLE AS) statement. This works for migrating data from any source such as Hive, Hudi, Delta Lake, relational databases, or any other source an engine can read from while simultaneously writing to an Iceberg table. The CTAS statement can be written to modify the data’s schema, partitioning, and more during the rewrite.
| PROS | CONS |
| Can be done with most engines | Rewriting all files |
| Allows you to transform the data during the migration process | Takes longer (write more files, take more time) |
| More expensive (write more files, more compute costs) |
Migration Method #1 – Using Dremio
With Dremio you can easily migrate any source compatible with Dremio (Hive tables, databases, JSON files, CSV files, Delta Lake tables, etc.) into an Iceberg table using a CTAS statement.
Let’s do an example that uses S3 as our data source and Iceberg catalog. For this exercise, you need to have an AWS S3 account and Docker installed.
Creating a Delta Lake Table in Our S3
In this exercise, we will open up a Docker container with Spark, and use it to write a small Delta Lake table to our S3 bucket. You’ll need your AWS access key, secret key, and the address of where you want to store your table in the format of s3a://…/folderForTable.
- Start up the Docker container.
docker run -it alexmerced/spark33playground
Note: If you want to rebuild this image, here is the dockerfile used to create it.
2. We need to export our AWS credentials into environmental variables.
export AWS_ACCESS_KEY_ID=xxxxxxxxx
export AWS_SECRET_ACCESS_KEY=xxxxxxxxx
export AWS_REGION=us-east-1
3. Open up SparkSQL with the default catalog configured to Delta Lake.
spark-sql --packages io.delta:delta-core_2.12:2.1.1,org.apache.hadoop:hadoop-aws:3.3.1 \
--conf "spark.sql.extensions=io.delta.sql.DeltaSparkSessionExtension" \
--conf "spark.sql.catalog.spark_catalog=org.apache.spark.sql.delta.catalog.DeltaCatalog" \
--conf spark.hadoop.fs.s3a.access.key=$AWS_ACCESS_KEY \
--conf spark.hadoop.fs.s3a.secret.key=$AWS_SECRET_ACCESS_KEY
4. Let’s create the Delta Lake table.
CREATE TABLE default.example_table (name string)
  USING DELTA LOCATION 's3a://.../example-table';
5. Insert a few records into the table.
INSERT into default.example_table (name)
  VALUES ('Alex Merced'),('Dipankar Mizumdar'),('Jason Hughes');
6. Head over to your S3 dashboard and double-check the write was successful.
7. Exit Spark-SQL with command exit;.
8. Exit the Docker container with the command exit.
9. Log in or sign up for Dremio and add your S3 as a source. If you don’t have an existing Dremio account, use the videos below to guide you in opening your free account.
10. Find the folder with your Delta Lake table and select “format folder” and then select Delta Lake to have the folder treated as a table in Dremio.

Dremio Approach A – Using a CTAS Statement (Shadow Migration)
11. Navigate to the SQLRunner and run a query to create a new table somewhere in your S3 bucket (it creates Iceberg tables by default) based on your Delta Lake table.
CREATE TABLE s3.delta.example_table
  AS (SELECT * FROM s3.iceberg.example_table);
Make sure that the path reflects your S3 source settings regarding the location of your table and the location where you want the new table to be created.
12. Check your S3 dashboard to confirm a new folder with your Iceberg data and meta exists where you meant to create it. You did it!

Conducting a Shadow/CTAS migration with Dremio is quite straightforward, and you can expect even more tools from Dremio in the future to help with in-place Apache Iceberg migrations. S3 isn’t the only Iceberg catalog that works with Dremio. Check out the following tutorial regarding the use of Dremio Arctic and AWS Glue catalogs with Apache Iceberg.
Dremio Approach B – Using the COPY INTO Statement (Shadow Migration)
Using a CTAS creates a new table, but what if you wanted to add the data from the Delta Lake table to an existing table? This is possible with the COPY INTO command which copies the values from a directory of files or individual files into a target table. At the time of this article, the COPY INTO command only supports CSV and JSON files, but when Parquet file support is added, you’ll be able to do something like this:
COPY INTO arctic.myTable
  FROM '@SOURCE/bucket/path/folder/deltatable/'
  FILE FORMAT 'parquet'
Migration Method #2 – Using Apache Spark
The Apache Iceberg project comes with many Spark libraries and extensions out of the box. In this section, we’ll see how we can use these with Delta Lake migration. First, we’ll see another example of shadow migration and then an example of in-place migration using Spark.
Shadow Migration in Spark
- Start up the Docker container.
docker run -it alexmerced/spark33playground
Note: If you want to rebuild this image, here is the dockerfile used to create it.
2. We need to export our AWS credentials into environmental variables, including a variable with the S3 location we’d like to store our Iceberg tables in. Make sure to prefix it with s3a://.
export AWS_ACCESS_KEY_ID=xxxxxxxxx
export AWS_SECRET_ACCESS_KEY=xxxxxxxxx
export AWS_REGION=us-east-1
export ICEBERG_WAREHOUSE=s3a://…
3. Start up Spark-SQL with the following command which configures the default catalog to use Delta Lake and configures another catalog called Iceberg to use Apache Iceberg.
spark-sql --packages io.delta:delta-core_2.12:2.1.1,org.apache.hadoop:hadoop-aws:3.3.1,org.apache.iceberg:iceberg-spark-runtime-3.3_2.12:1.0.0,software.amazon.awssdk:bundle:2.17.178,software.amazon.awssdk:url-connection-client:2.17.178 \
--conf spark.sql.catalog.spark_catalog=org.apache.spark.sql.delta.catalog.DeltaCatalog \
--conf "spark.sql.extensions=io.delta.sql.DeltaSparkSessionExtension,org.apache.iceberg.spark.extensions.IcebergSparkSessionExtensions" \
--conf spark.sql.catalog.iceberg=org.apache.iceberg.spark.SparkCatalog \
--conf spark.sql.catalog.arctic.io-impl=org.apache.iceberg.aws.s3.S3FileIO \
--conf spark.sql.catalog.iceberg.type=hadoop \
--conf spark.sql.catalog.iceberg.warehouse=$ICEBERG_WAREHOUSE \
--conf spark.hadoop.fs.s3a.access.key=$AWS_ACCESS_KEY \
--conf spark.hadoop.fs.s3a.secret.key=$AWS_SECRET_ACCESS_KEY
4. Let’s create a Delta Lake table.
CREATE TABLE default.example_table2 (name string) USING DELTA LOCATION 's3a://am-demo-cloud/nov2022/delta/112122/example_table2'
5. Let’s add some records to our Delta Lake table.
INSERT into default.example_table3 (name) VALUES ('Alex Merced'),('Dipankar Mizumdar'), ('Jason Hughes');6. Check your S3 dashboard to confirm the table was written.
7. Let’s then use a CTAS to convert that Delta Lake table over to Iceberg.
CREATE TABLE iceberg.example_table2 USING iceberg AS SELECT * FROM default.example_table2;
It’s that simple. You can now go to the location you specified for your Iceberg tables and find your table in your S3 storage. The process would be pretty much the same with any other Iceberg catalog (AWS Glue, Dremio Arctic, etc.). The only difference is the catalog implementation would be different when you start Spark, for example:
AWS Glue
spark-sql --packages io.delta:delta-core_2.12:2.1.1,org.apache.hadoop:hadoop-aws:3.3.1,org.apache.iceberg:iceberg-spark-runtime-3.3_2.12:1.0.0,org.projectnessie:nessie-spark-extensions-3.3_2.12:0.44.0,software.amazon.awssdk:bundle:2.17.178,software.amazon.awssdk:url-connection-client:2.17.178 \
--conf "spark.sql.extensions=io.delta.sql.DeltaSparkSessionExtension,org.apache.iceberg.spark.extensions.IcebergSparkSessionExtensions,org.projectnessie.spark.extensions.NessieSparkSessionExtensions" \
--conf "spark.sql.catalog.spark_catalog=org.apache.spark.sql.delta.catalog.DeltaCatalog" \
--conf spark.sql.catalog.glue.catalog-impl=org.apache.iceberg.aws.glue.GlueCatalog \
--conf spark.sql.catalog.glue.warehouse=$WAREHOUSE \
--conf spark.sql.catalog.glue=org.apache.iceberg.spark.SparkCatalog \
--conf spark.sql.catalog.glue.io-impl=org.apache.iceberg.aws.s3.S3FileIO \
--conf spark.hadoop.fs.s3a.access.key=$AWS_ACCESS_KEY \
--conf spark.hadoop.fs.s3a.secret.key=$AWS_SECRET_ACCESS_KEY
Dremio Arctic/Project Nessie
spark-sql --packages io.delta:delta-core_2.12:2.1.1,org.apache.hadoop:hadoop-aws:3.3.1,org.apache.iceberg:iceberg-spark-runtime-3.3_2.12:1.0.0,org.projectnessie:nessie-spark-extensions-3.3_2.12:0.44.0,software.amazon.awssdk:bundle:2.17.178,software.amazon.awssdk:url-connection-client:2.17.178 \
--conf "spark.sql.extensions=io.delta.sql.DeltaSparkSessionExtension,org.apache.iceberg.spark.extensions.IcebergSparkSessionExtensions,org.projectnessie.spark.extensions.NessieSparkSessionExtensions" \
--conf "spark.sql.catalog.spark_catalog=org.apache.spark.sql.delta.catalog.DeltaCatalog" \
--conf spark.sql.catalog.arctic.uri=$ARCTIC_URI \
--conf spark.sql.catalog.arctic.ref=main \
--conf spark.sql.catalog.arctic.authentication.type=BEARER \
--conf spark.sql.catalog.arctic.authentication.token=$TOKEN \
--conf spark.sql.catalog.arctic.catalog-impl=org.apache.iceberg.nessie.NessieCatalog \
--conf spark.sql.catalog.arctic.warehouse=$WAREHOUSE \
--conf spark.sql.catalog.arctic=org.apache.iceberg.spark.SparkCatalog \
--conf spark.sql.catalog.arctic.io-impl=org.apache.iceberg.aws.s3.S3FileIO \
--conf spark.hadoop.fs.s3a.access.key=$AWS_ACCESS_KEY \
--conf spark.hadoop.fs.s3a.secret.key=$AWS_SECRET_ACCESS_KEY
In-Place Migration in Spark
That Delta Lake table we just created could also be used to do an in-place migration. In this case, we will use the built-in add_files Spark procedure, which takes a target file/files and adds them to an existing Iceberg table.
Since our Delta Lake table only has one snapshot we can assume all the Parquet files in its directory on S3 should be added to our table, but if it was an older table with many snapshots that wouldn’t be the case. In that case, you would use a VACUUM SQL query to clean data only related to snapshots earlier than so many hours like so:
VACUUM default.example_table RETAIN 100 HOURS
This removes all data files that aren’t related to snapshots from within the last 100 hours. Keep in mind that you may need to change the following setting to VACUUM files for values less than 168 hours:
spark.databricks.delta.retentionDurationCheck.enabled = false
Although our table only has one snapshot, so we shouldn’t have to worry about this at the moment:
- Create a new Iceberg table that we will add to the Delta Lake table’s Parquet files too.
CREATE TABLE iceberg.example_table3 (name STRING) USING iceberg;
2. Use the add files procedure to add the files. We need to point it to the directory on S3 where the table’s files are being stored.
CALL iceberg.system.add_files(
  table => 'example_table3',
  source_table => '`parquet`.`s3a://.../example_table2/`'
)
3. Query the table to see that your Iceberg table should now have the data inside of it, without needing to rewrite any data files.
SELECT * FROM iceberg.example_table3;
Migration Method #3 – Using an Iceberg Action
New modules for converting Delta Lake and Apache Hudi tables to Apache Iceberg have been added to the Iceberg repository. The Delta Lake module has been merged into Apache Iceberg’s codebase and is now part of the 1.2.0 release, while the Apache Hudi module is still a work in progress.
Essentially, the method that handles the conversion takes the Spark session, new table identifier, along with the location of the tables files, and creates a new Iceberg table from them.
SnapshotDeltaLakeTable.Result result =         DeltaLakeToIcebergMigrationSparkIntegration.snapshotDeltaLakeTable(
  	sparkSession,
  	newTableIdentifier,
  	partitionedLocation
  ).execute();
The Apache Hudi version of this method is yet to be merged into the main Apache Iceberg codebase but follows the same API.
SnapshotHudiTable.Result result =         HudiToIcebergMigrationSparkIntegration.snapshotHudiTable(
  	sparkSession,
  	newTableIdentifier,
  	partitionedLocation
  ).execute();
While the documentation does not yet include details on how to use these modules, reading over the integration tests for both the Delta Lake module and Hudi module helps illuminate the nuances of the above code snippets.
Best Practices
Whether you restate the data with a shadow migration or avoid restating the data with an in-place migration, the actual migration process needs careful attention to the architecture.
In general, it should go through a four-phase process:
- As the process begins, the new Iceberg table is not yet created or in sync with the source. User-facing read and write operations remain operating on the source table.
- The table is created but not fully in sync. Read operations are applied on the source table and write operations are applied to the source and new table.
- Once the new table is in sync, you can switch to read operations on the new table. Until you are certain the migration is successful, continue to apply write operations to the source and new table.
- When everything is tested, synced, and works properly, you can apply all read and write operations to the new Iceberg table and retire the source table.

As you progress through these phases, be sure to check for consistency, logging errors, and logging progress. These checks can help you manage quality, troubleshoot, and measure the length of the migration.
Conclusion
Apache Iceberg, with its ever-expanding features, ecosystem, and support, is quickly becoming the standard format data lakehouse table. When adopting Apache Iceberg there are several paths of migration no matter where your data architecture currently resides.
Sign up for AI Ready Data content


