Upgrading Dremio AWS Edition
Table of Contents
Table of Contents
Intro
Dremio Dremio AWS Edition, a production-grade, high-scale data lake engine highly optimized for AWS, delivers cost savings and makes it very easy to deploy a Dremio cluster in AWS. Learn more about the Dremio AWS Edition and check out the onboarding videos to get started.
Whether you are a current user of Dremio AWS Edition, or are about to do your first deployment on your AWS account, this tutorial guides you through the steps to upgrade your Dremio version so you can keep your environment up to date and take advantage of all the great features that Dremio includes in its latest release.
The following scenario, upgrades Dremio AWS Edition (AWSE) to Dremio AWS - BYOL using the following steps:
1. Login to the Dremio UI as an admin
Click on the “Admin” button at the top right corner.

Then click on “Stop Project.”

Confirm that you want to stop the project by clicking “Stop.”

2. Create a stack in AWS
Now you need to set up a new instance and attach it to the same project. To do this, go to the AWS Marketplace and choose the latest version of Dremio AWS - BYOL.
NOTE: If you are upgrading to a Dremio AWSE Release prior to 24.3.3, you can access the legacy Dremio Community Edition versions here on the AWS Marketplace. You or someone within your organization must have been already subscribed to this specific product in order to access this page.

Select “Continue to Subscribe.”

In the next screen select “Continue to Configuration.”

Then click on “Continue to Launch.”

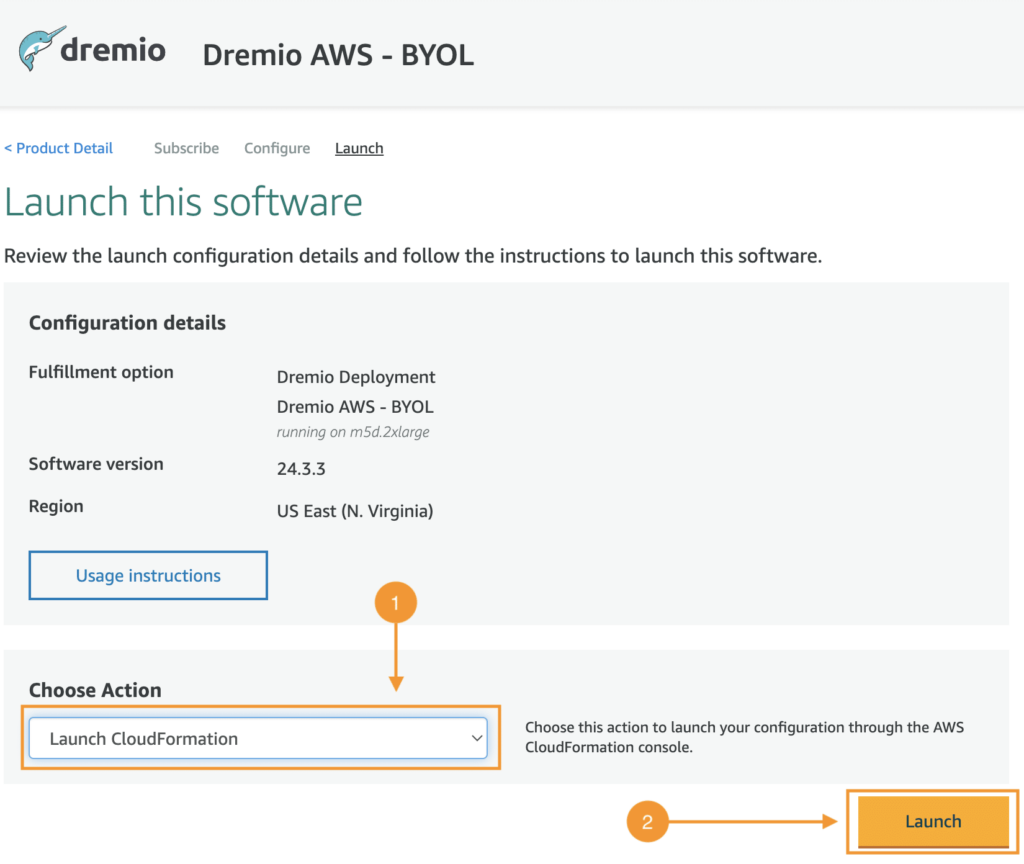
In the “Launch this software” screen, select “Launch CloudFormation” and then click “Launch.”

In the “Create stack” screen leave everything as it is and click “Next.”

Specify the stack details (name and parameters) and then click “Next.”

Configure the stack options, provide a tag (in this case I used the tag “Owner” with my name as a value) and then click “Next.”

Check the box to acknowledge, and then click “Create stack.”

3. Launch the new Dremio instance
On the AWS console, go to the Instances page and take note of the instance’s public IP. Be aware the IP will be different from prior and you'll need to adjust the Dremio host mapping (within the Load Balancer).

Now on a web browser, launch the URL noted above using port 9047, in this case the URL is 2.55.224.14:9047, then enter the instance ID from the AWS console and click “Authenticate.”

In the following screen, click on the “Open” action for the project that was terminated at the beginning of the tutorial.

Once you confirm that you want to open the project, Dremio will start the deployment process. This will take a few minutes.

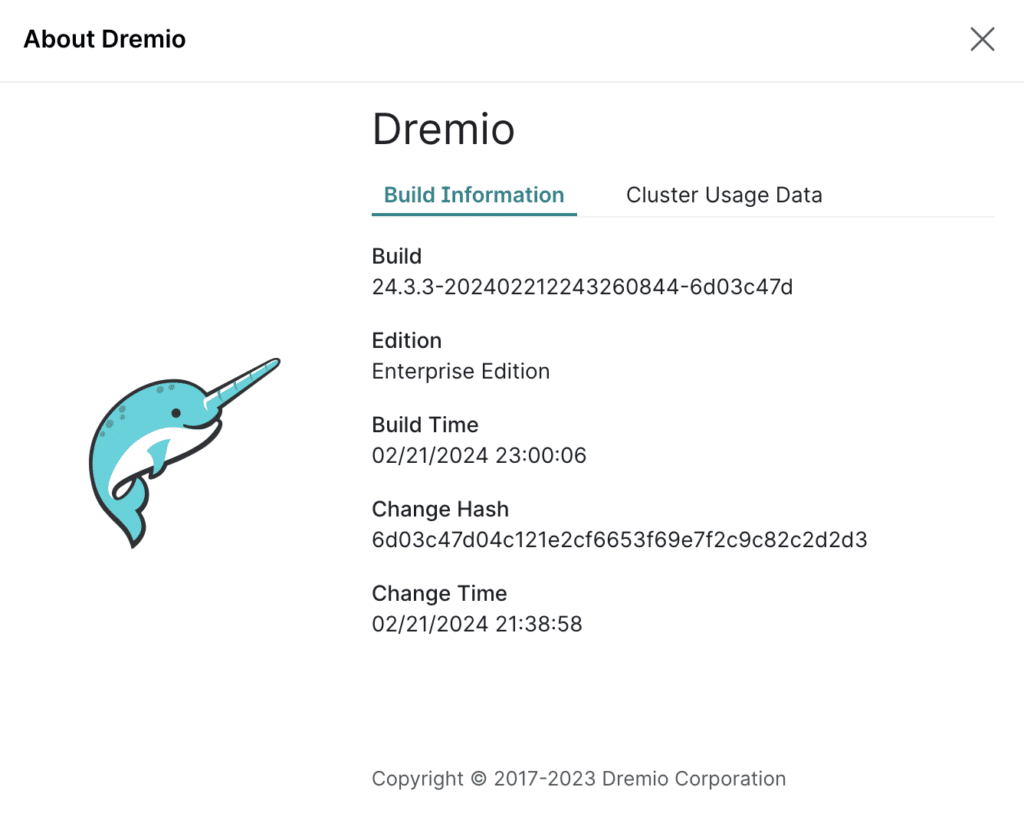
When the deployment is complete, login and then check the version number. As all of the steps are successfully completed you should see the latest version in the “About Dremio” screen.

For a complete list of new features, enhancements, changes and fixes, please review the latest release notes. As always, your feedback is welcome. Please post any questions or comments on our community site.

