19 minute read · September 22, 2023
Intro to Dremio, Nessie, and Apache Iceberg on Your Laptop

· Head of DevRel, Dremio

We're always looking for ways to better handle and save money on our data. That's why the "data lakehouse" is becoming so popular. It offers a mix of the flexibility of data lakes and the ease of use and performance of data warehouses. The goal? Make data handling easier and cheaper.
So, how do we set up a data lakehouse? There are a lot of tools out there, but three stand out: Dremio, Nessie, and Apache Iceberg. Let's dive into what each one does and how you can try them out on your own computer.
Here's a Quick Introduction to the Three Tools:
Dremio
Dremio is a lakehouse platform that allows you to federate disparate data sources, organize/document/govern the data in a unified semantic layer, performantly query the data, and make it available through a variety of interfaces to facilitate many use cases. Essentially, Dremio makes data lakehouses easier and faster while leveraging open source technologies.
Nessie
Nessie is a transactional data catalog that allows you to track your data lakehouse tables but with an innovative twist: Nessie allows Git-like capabilities to capture catalog changes using commits and create isolated environments for changes via branches. Nessie enables better patterns for integrating new data, disaster recovery, and more. Nessie also enables multi-table transactions on the lakehouse.
Apache Iceberg
Apache Iceberg is a data lakehouse table format that provides a metadata layer that allows tools to see groups of files as “tables,” upon which you can execute queries, inserts, updates, deletes, etc. Iceberg turns your data lake into an ACID-compliant data lakehouse with other great features like time travel, schema evolution, partition evolution, and more.
Prerequisites and Setup
You will need Docker installed. If not already installed, simply head over to docker.com and install it.
Open an IDE or text editor to a blank directory and create a file called docker-compose.yml with the following content:
###########################################
# Notebook- Iceberg - Nessie Setup
###########################################

version: "3"

services:
  # Nessie Catalog Server Using In-Memory Store
  nessie:
    image: projectnessie/nessie:latest
    container_name: nessie
    networks:
      iceberg:
    ports:
      - 19120:19120
  # Minio Storage Server
  minio:
    image: minio/minio:latest
    container_name: minio
    environment:
      - MINIO_ROOT_USER=admin
      - MINIO_ROOT_PASSWORD=password
      - MINIO_DOMAIN=storage
      - MINIO_REGION_NAME=us-east-1
      - MINIO_REGION=us-east-1
    networks:
      iceberg:
    ports:
      - 9001:9001
      - 9000:9000
    command: ["server", "/data", "--console-address", ":9001"]
  # Dremio
  dremio:
    platform: linux/x86_64
    image: dremio/dremio-oss:latest
    ports:
      - 9047:9047
      - 31010:31010
      - 32010:32010
    container_name: dremio
    environment:
      - DREMIO_JAVA_SERVER_EXTRA_OPTS=-Dpaths.dist=file:///opt/dremio/data/dist
    networks:
      iceberg:
networks:
  iceberg:
Setting Up Dremio/Nessie/Minio
Next, you need to open up a terminal where you will start up Dremio with the command:
docker-compose up dremio
After a few minutes, you can access Dremio in your browser at localhost:9047. While Dremio starts up, open another terminal window and create your storage layer with Minio with the following command:
docker-compose up minio
Then start up a Nessie server which will be the catalog to track our Apache Iceberg tables.
docker-compose up nessie
Once all three are up and running, head over to localhost:9000 to log in to Minio with the username “admin” and the password “password”. From the menu on the left, click on the “buckets” section and create a bucket named “warehouse”. Minio is an S3-compatible storage layer, so a bucket is essentially where you can save files in object storage solutions like S3 and Minio.
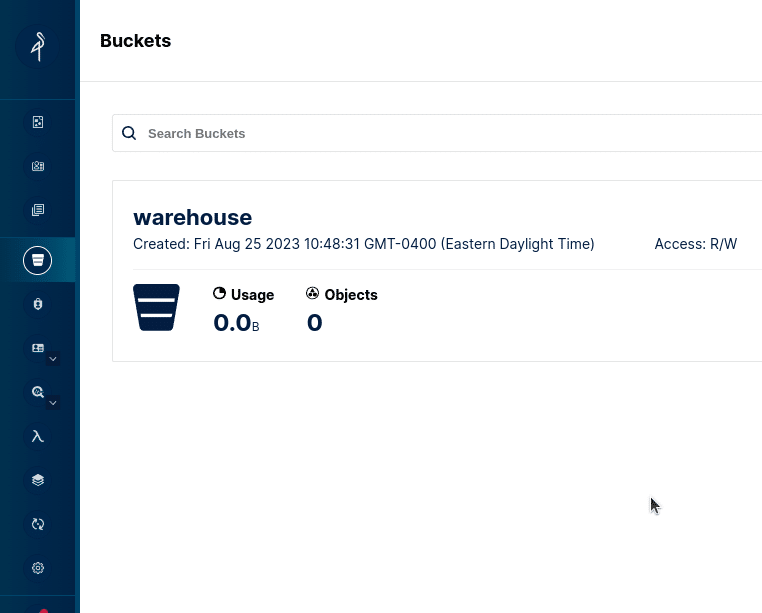
Then head over to localhost:9047 and set up your Dremio account until you get to the Dremio dashboard. Then click on “add source” and select “Nessie”.
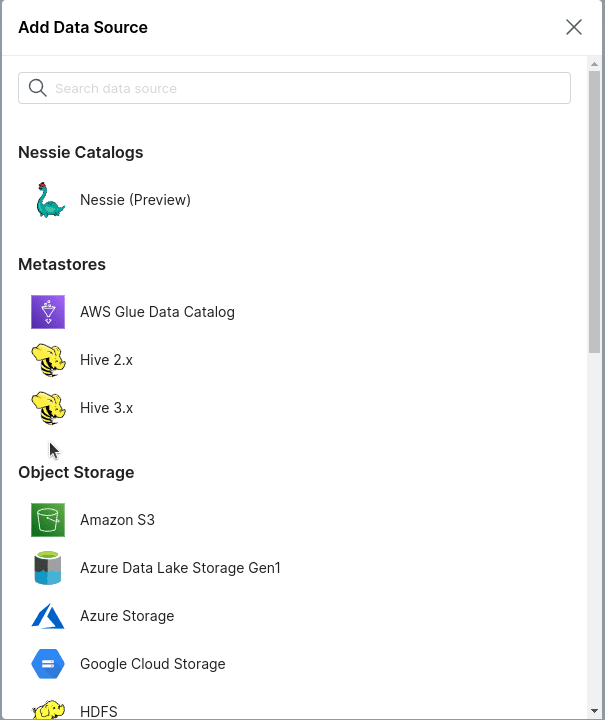
- Set the name of the source to “nessie”
- Set the endpoint URL to “http://nessie:19120/api/v2”
- Set the authentication to “none”
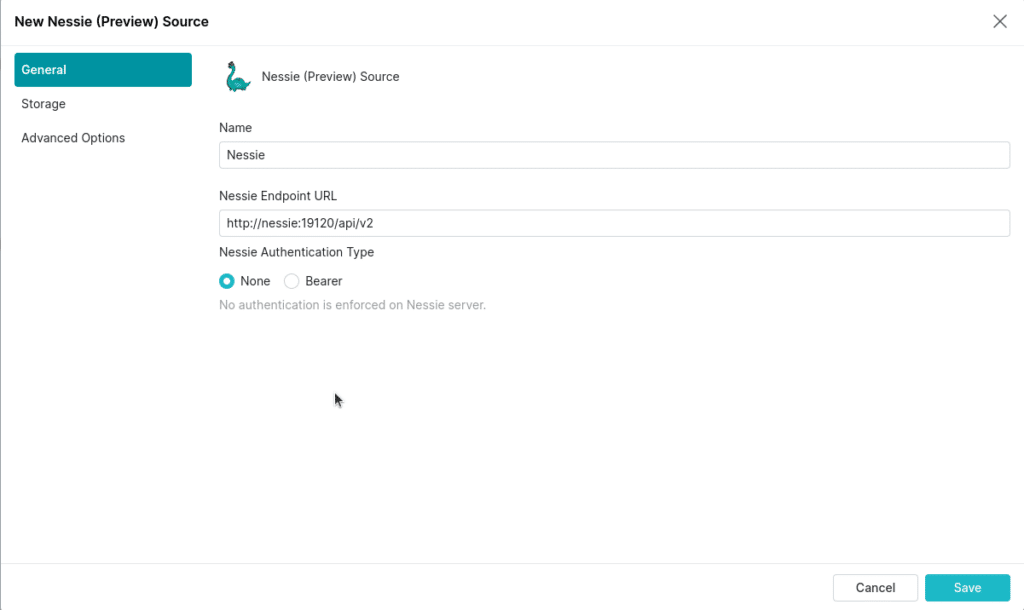
- Navigate to the storage tab, by clicking on “storage” on the left
- For your access key, set “admin”
- For your secret key, set “password”
- Set root path to “/warehouse”
- Set the following connection properties:
- “fs.s3a.path.style.access” to true
- “fs.s3a.endpoint” to “minio:9000”
- “dremio.s3.compat” to “true”
- Uncheck “encrypt connection” (since our local Nessie instance is running on http)
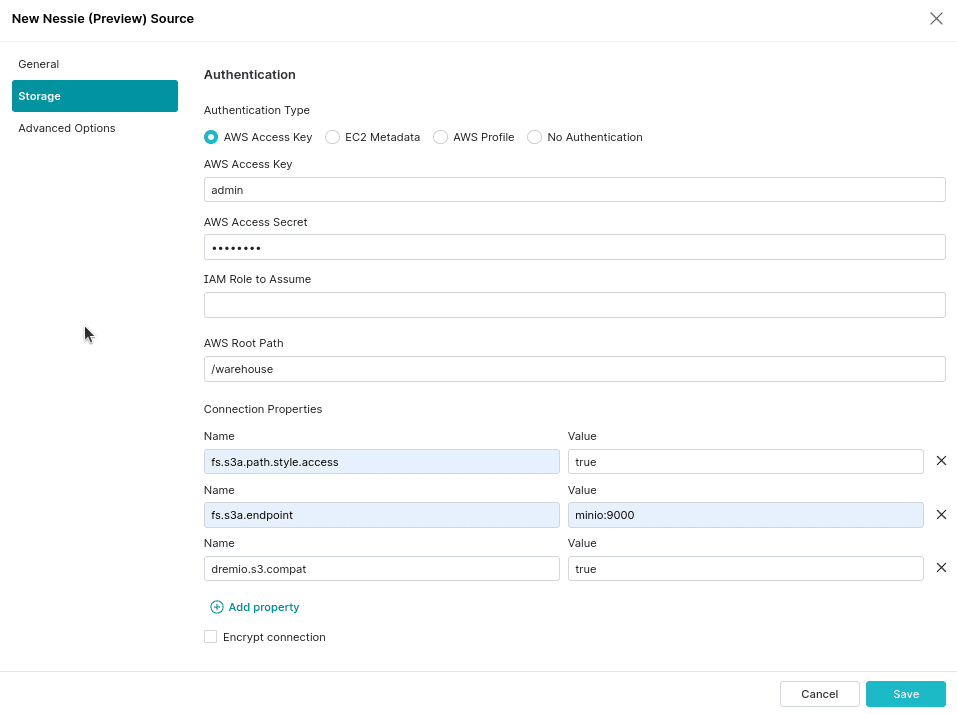
Now we have our source connected and we can begin using Apache Iceberg from Dremio, but keep in mind that all the tables that we will create are accessible by any tool that supports Nessie catalogs like Apache Flink, Apache Spark, Presto, Trino, and more.
Running Queries in Dremio
Let’s click on the SQL Runner on the menu to the left, and write the following SQL. Make sure to click on “context” in the upper right area of the text editor and set it to our Nessie source, or else we’ll have to type “nessie.people” instead of just “people” to run this query.
CREATE TABLE people (
id INT,
first_name VARCHAR,
last_name VARCHAR,
age INT
) PARTITION BY (truncate(1, last_name));
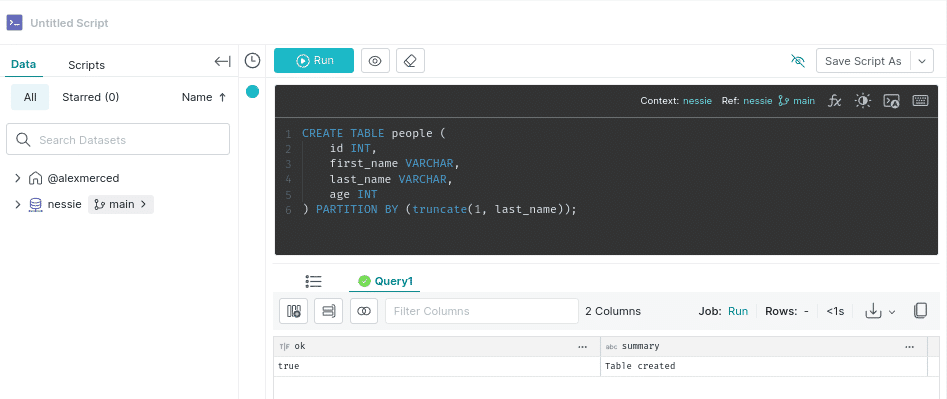
Note: The performance of queries in this exercise will be reflective of your local hardware in a single-node setup and isn’t representative of a deployed Dremio cluster with several nodes and a coordinator.
Notice the truncate(1, last_name) clause in our PARTITION BY clause, this is an Apache Iceberg partition transform which is part of a feature called Hidden Partitioning that allows us to define sophisticated partitioning logic without creating extra columns that make querying the table more complicated. Essentially, we are partitioning a table by the first letter of the person's last_name.
You can see that the initial metadata was created by going back to Minio on localhost:9000 and examining your warehouse bucket. Now, let’s head back to Dremio and insert some data into our table with the following query:
INSERT INTO people (id, first_name, last_name, age) VALUES
(1, 'John', 'Doe', 28),
(2, 'Jane', 'Smith', 34),
(3, 'Alice', 'Johnson', 22),
(4, 'Bob', 'Williams', 45),
(5, 'Charlie', 'Brown', 30),
(6, 'David', 'Jones', 25),
(7, 'Eve', 'Garcia', 32),
(8, 'Frank', 'Miller', 29),
(9, 'Grace', 'Lee', 27),
(10, 'Henry', 'Davis', 38);
After running this query, go back to Minio and take a look and you’ll see a folder with our partitioned files labeled by the partition value they represent.
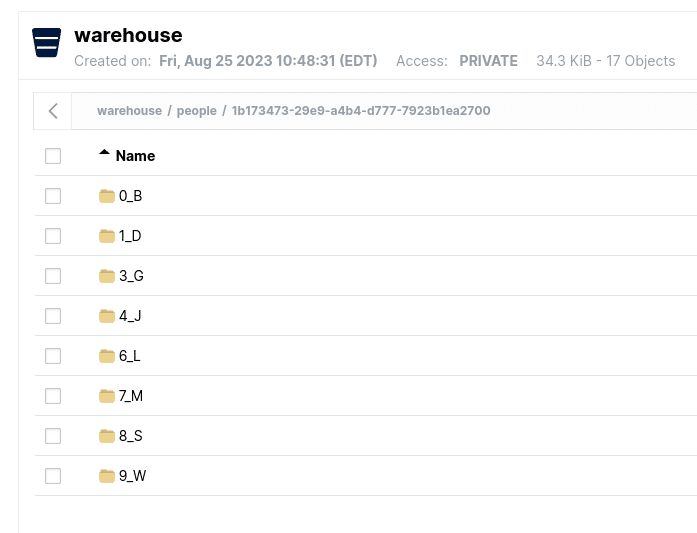
Usually, if we wanted to change how our data is partitioned we would have to rewrite all of our data. A unique feature in Apache Iceberg is something called Partition Evolution that allows us to change our partitioning rules without requiring us to rewrite our existing data based on the change. Let’s change our partitioning to also partition based on the first letter of the first name.
ALTER TABLE people ADD PARTITION FIELD truncate(1, first_name);
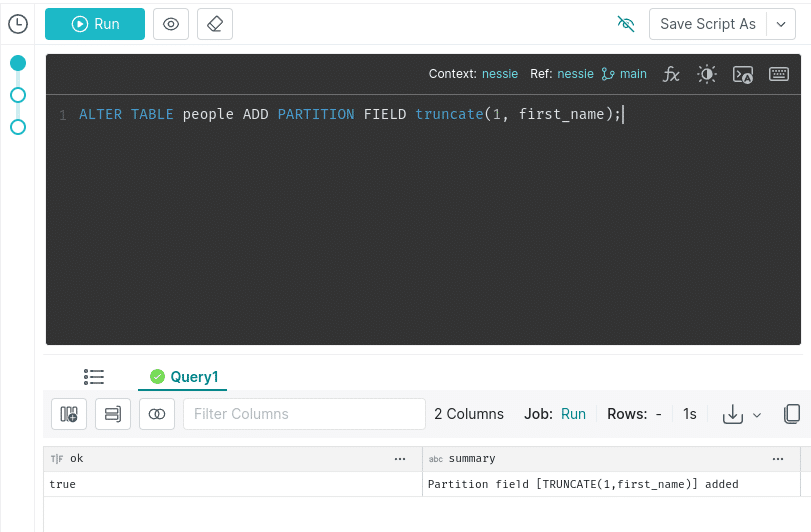
Let’s insert some more records and see what happens:
INSERT INTO people (id, first_name, last_name, age) VALUES (11, 'Isabella', 'Rodriguez', 40), (12, 'Jack', 'Martinez', 36), (13, 'Kylie', 'Hernandez', 24), (14, 'Leo', 'Lopez', 26), (15, 'Mia', 'Gonzalez', 35), (16, 'Nolan', 'Perez', 29), (17, 'Olivia', 'Wilson', 31), (18, 'Paul', 'Anderson', 33), (19, 'Quinn', 'Thomas', 27), (20, 'Rebecca', 'Taylor', 28);
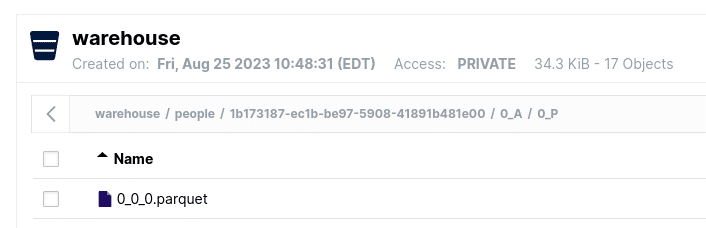
If we go back to Minio, we’ll see in some of our last_name partition folders there are now folders for new data written with the secondary first name partitioning. In the image below, you can see a folder for last_names that start with A (0_A) and in it is a folder for first_names that start with P (0_P), and inside that folder is one of the Parquet files we just wrote (the Parquet file, in this case, would have 1 record for “Paul Anderson”).
Let’s run the following query:
SELECT * FROM nessie.people WHERE last_name LIKE 'G%';
Now, what if we wanted to view this data again later but didn’t want to have to type out the whole query again? We can save it as a view. Just click in the upper-right corner in the “Save As” dropdown and select “Save As View” and save it in our Nessie catalog.
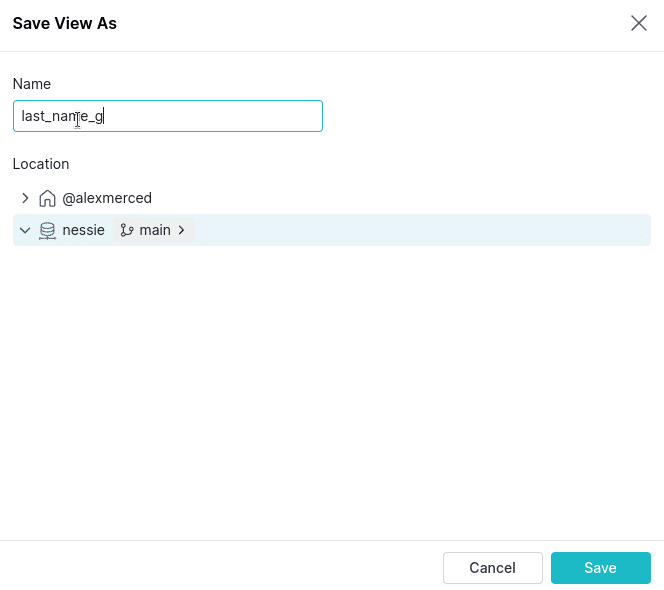
Another great feature of Nessie or Dremio Arctic catalogs is that they can save views on your data as well, making your views portable with any tools that connect with the catalog (though other engines may not be able to run any engine-specific SQL syntax). On full deployments of Dremio we can control which users/roles have access to this view along with any column and row masking rules we’d like to apply, allowing Dremio to be a center for data access and governance.
Branching and Merging
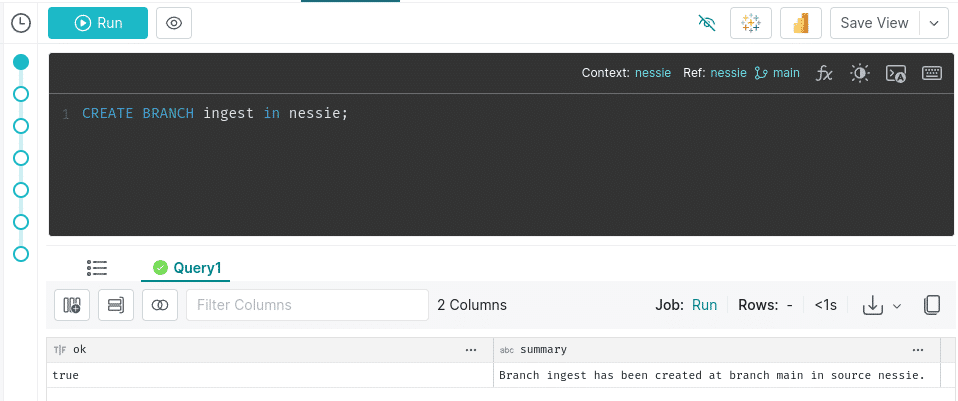
One of the key features of Nessie is the ability to branch the catalog, so let’s give this a try and run the following SQL:
CREATE BRANCH ingest in nessie;
Now let’s use the branch to add more records with the following SQL:
USE BRANCH ingest;
INSERT INTO nessie.people (id, first_name, last_name, age) VALUES
(21, 'Samuel', 'Graham', 42),
(22, 'Tina', 'Gray', 37),
(23, 'Ursula', 'Green', 45),
(24, 'Victor', 'Gibson', 29),
(25, 'Wendy', 'Gates', 31),
(26, 'Xavier', 'Graves', 28),
(27, 'Yasmine', 'Gomez', 30),
(28, 'Zane', 'Goodman', 33),
(29, 'Aria', 'Guthrie', 25),
(30, 'Brock', 'Garner', 40);
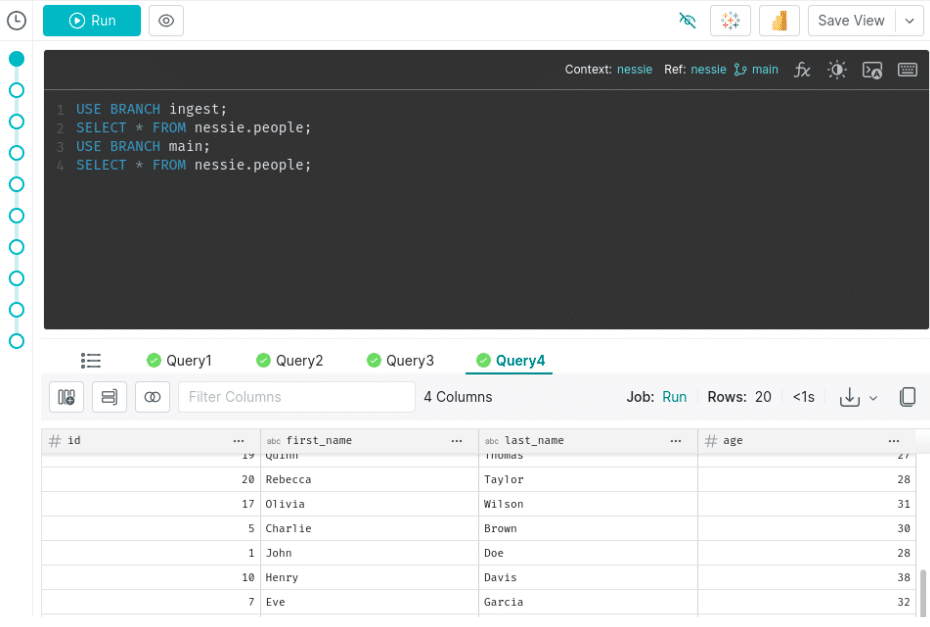
The “use branch" statement makes sure to switch branches at the beginning of the job, then the insert runs but only affects the data on the ingest branch and not in our main branch. We can prove this by running the following SQL:
USE BRANCH ingest;
SELECT * FROM nessie.people;
USE BRANCH main;
SELECT * FROM nessie.people;
If you browse the results of queries 2 and 4 you’ll see that query 2 has 30 records, since that is on our ingest branch with the additional records, and that query 4 has 20 records since it was not affected by transactions on the branch.
We can then merge those changes into our main branch with the following SQL:
MERGE BRANCH ingest INTO main IN nessie;
Now the additional 10 records will be visible to those who query the main branch (the default branch).
Working with CSV Files
Head over to mockaroo.com to generate some sample CSV data, just use the default values and hit “generate data” to get a CSV file with 1,000 random records. From the Dremio UI we can upload this CSV file.
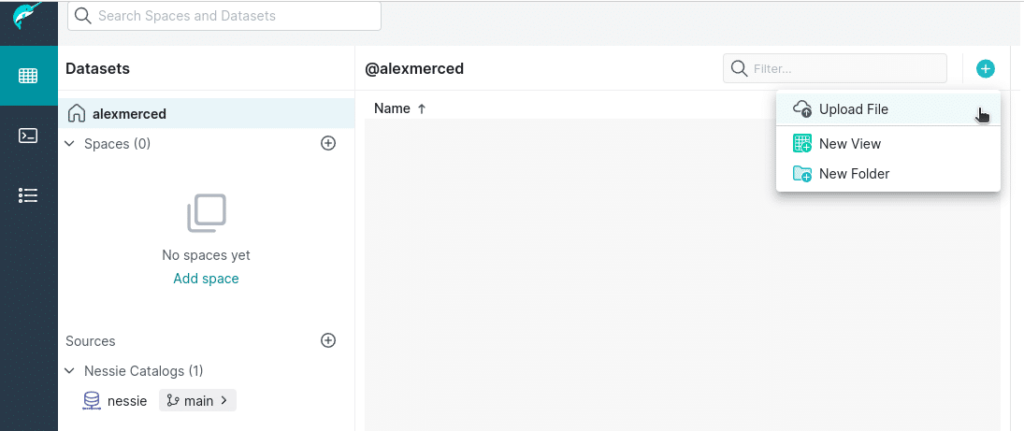
Head over to the main datasets section of the UI and click the “+” icon and choose to upload a file. (You could also access files on any storage source, like connecting Minio directly to Dremio).
On the formatting sections make sure to choose the right line delimiter for your file and extract field names, then click “save”.
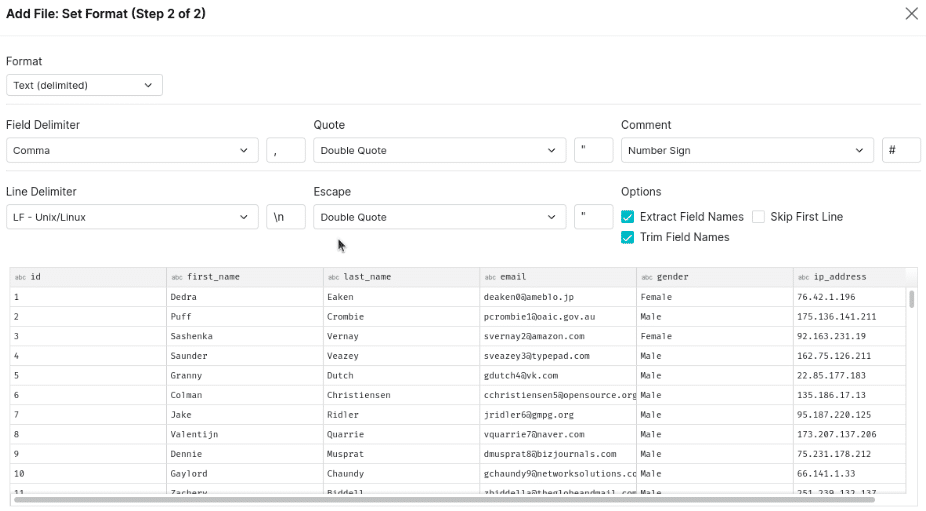
You’ll notice that if you query this data that all the fields are text fields, this is because CSV files don’t have schemas but Dremio makes it easy to convert the data types of fields.
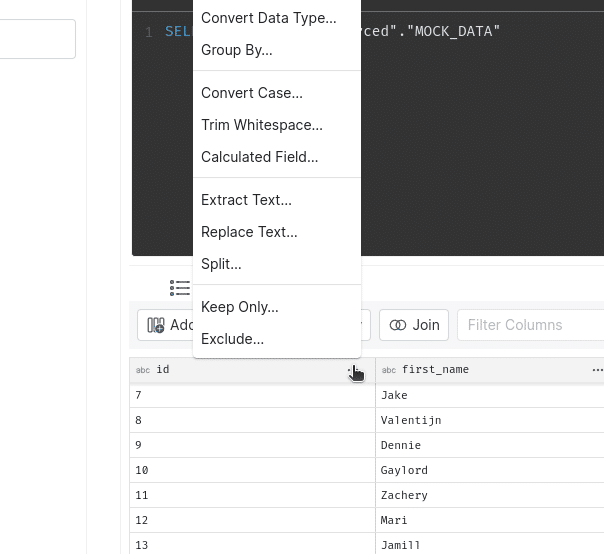
There is a menu accessible from the header of each field that includes several utilities for working with different fields such as converting types, aggregating with group by, creating calculated fields, etc. Select “Convert Data Type”.
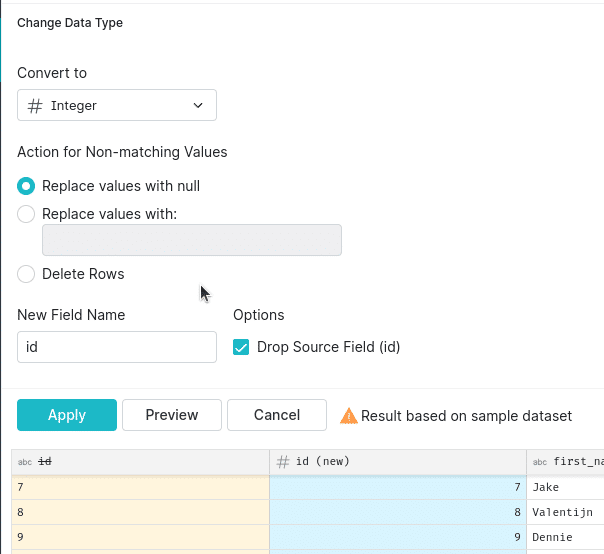
Select an “Integer” field on the next screen and then “Apply”.
Now we can save all of our changes by saving this SQL as a view. Again, save this view to the Nessie catalog as “MOCK_DATA_CURATED”.
Let’s say you wanted to convert this CSV file into an Apache Iceberg table to improve performance, especially on larger datasets, there are two approaches you can take.
- Use CTAS to make a new table from our view with the updated schema.
CREATE TABLE MOCK_DATA_CTAS AS SELECT * FROM nessie."MOCK_DATA_CURATED";
- USE COPY INTO to add the data from the CSV file into an existing Apache Iceberg table. This requires a storage source like S3 or Minio for you to store the CSV files. This also works with JSON files.
-- CREATE AN EMPTY TABLE WITH A MATCHING SCHEMA
CREATE TABLE MOCK_DATA_COPY AS SELECT * FROM nessie."MOCK_DATA_CURATED" limit 0;
-- COPY THE DATA FROM THE CSV INTO THE TABLE
COPY INTO MOCK_DATA_COPY FROM "@minio" FILES ('MOCK_DATA.csv');
Conclusion
You can now spin down these containers by running the following command in another terminal:
docker-compose down
You’ve now experienced how easy it is to work with Apache Iceberg from Dremio and use features like Hidden Partitioning and Partition Evolution while getting additional data-as-code benefits from Nessie’s Git-like features. If you enjoy this experience, the next step is to create your free Dremio Cloud account which unlocks even more features and functionality!
Sign up for AI Ready Data content
Additional Resources
BLOG
The Why and How of Using Apache Iceberg on Databricks
Dremio Blog: Open Data Insights,
Learn More ->
BLOG
5 Use Cases for the Dremio Lakehouse
With its capabilities in on-prem to cloud migration, data warehouse offload, data virtualization, upgrading data lakes and lakehouses, and building customer-facing analytics applications, Dremio provides the tools and functionalities to streamline operations and unlock the full potential of data assets.
Dremio Blog: News Highlights, Dremio Blog: Open Data Insights,
Learn More ->

BLOG
Apache Iceberg 101 – Your Guide to Learning Apache Iceberg Concepts and Practices
This article provides an introductory course on the concepts and practices of Apache Iceberg tables for running scalable data lakehouses.
Dremio Blog: Open Data Insights,
Learn More ->