Moving data from source systems like MongoDB to a dashboard traditionally involves a multi-step process: transferring data to a data lake, moving it into a data warehouse, and then building BI extracts and cubes for acceleration. This process can be tedious and costly. However, this entire workflow is simplified with Dremio, the Data Lakehouse Platform. Dremio enables you to directly serve BI dashboards from MongoDB or leverage Apache Iceberg tables in your data lake. This post will explore how Dremio's data lakehouse platform simplifies your data delivery for business intelligence by doing a prototype version that can run on your laptop.
Setting Up Our Environment
To run this exercise on your laptop, you will need Docker Desktop to run Docker Compose files and spin up our environment. In an empty folder, create a docker-compose.yml file with the following:
This Docker Compose file sets up a development environment for integrating MongoDB with a BI dashboard through Dremio and Apache Iceberg, leveraging additional tools like Nessie and MinIO. Here's what each service in the file represents:
Nessie: Acts as a catalog server using an in-memory store, helping to manage and version data in the data lake. It runs on port 19120 and is part of the mongodb-dremio-superset network, facilitating integration with Dremio and MongoDB for table cataloging and version control.
MinIO: Serves as a storage server, mimicking a cloud storage environment locally. It's configured with essential security and region settings and exposes ports 9000 for API access and 9001 for the console. MinIO provides the storage layer for the data lake, where data from MongoDB can be stored and managed before processing with Dremio.
Dremio: This is the core component of the data lakehouse platform, providing the ability to directly query and manage data across different sources like MongoDB and the data stored in MinIO. It exposes several ports for different purposes, such as the Dremio UI (9047), and data communication (31010 and 32010).
MongoDB: It uses the latest version of the official MongoDB image (mongo:latest). The service is configured with environment variables MONGO_INITDB_ROOT_USERNAME and MONGO_INITDB_ROOT_PASSWORD, set to root and example, respectively, establishing the default credentials for MongoDB's root user. The container's port 27017, the default MongoDB port, is mapped to the host's port 27017, allowing direct access to MongoDB from the host machine. Additionally, it is connected to a custom network named mongodb-dremio-superset, which would typically be used to facilitate communication between this MongoDB container and other services, such as Dremio and Superset, defined in the same Docker Compose environment.
Superset: A business intelligence tool configured to connect with Dremio, allowing users to create and view dashboards and reports. It runs on port 8088 but is mapped to 8080 on the host machine for easy access.
The networks section defines a custom network named mongodb-dremio-superset, ensuring these services can communicate seamlessly within this isolated network environment.
In the context of our blog, this Docker Compose setup illustrates how to create a local development environment that mirrors the process of moving data from MongoDB to a BI dashboard using Dremio and Apache Iceberg, with Nessie for table cataloging and MinIO for simulating a cloud storage environment.
To spin up the environment, simply run the command:
docker compose up
Populating Data in Our MongoDB Database
To access the MongoDB database shell and populate it with data to simulate data in operational databases, run the following command in another terminal window or tab:
To quit the MongoDB shell run the following command:
exit()
Connecting MongoDB, Nessie, and Minio to Dremio
Open MinIO in the browser at localhost:9000 and log in with username “admin” and password “password”. Once you log in, create a new bucket called “warehouse”. Keep in mind that Nessie is always running in the background and is accessed by a REST API which is how the Dremio connector communicates with the catalog.
Now, head over to localhost:9047 in your browser to set up your Dremio admin account. Once that is set up, click “add a Source” and select a “Nessie” as the source. Enter in the following settings:
Uncheck “Encrypt Connection” Box (since we aren’t using SSL)
Connection Properties
Key: fs.s3a.path.style.access | Value: true
Key: fs.s3a.endpoint | Value: minio:9000
Key: dremio.s3.compat | Value: true
Click on “Save,” and the source will be added to Dremio. You can then run full DDL and DML SQL against it. Dremio turns your data lake into a data warehouse—a data lakehouse!
Now let’s add a MongoDB source with the following settings:
Name: mongodb
Host: mongodb
Port: 27017
Auth Database Name: admin
Username: root
Password: example
Once you save the source, you can see both sources on the Dremio dashboard and begin working with them.
Moving Our MongoDB Data to Our Data Lake
Historically, moving data from our databases into our data lake as Apache Iceberg tables would require spinning up an Apache Spark cluster and writing complex jobs in Python, Java, or Scala. But with Dremio, we can move our data to our data lake with some simple SQL.
Head over to the SQL Runner in the Dremio UI and run the following query to ingest the table in MongoDB as an Apache Iceberg table in our Nessie source:
CREATE TABLE nessie.sales_data AS SELECT * FROM mongodb.dashboardDB.dashboardData;
This is a great way to move the table to your data lake initially. To update the table, you can use the INSERT INTO SELECT statement, adding all records with a higher ID value to the highest ID value in the destination. This will ensure only new records are added to the table.
INSERT INTO nessie.sales_data
SELECT *
FROM MongoDB.public."sales_data"
WHERE RecordID > (SELECT COALESCE(MAX(RecordID), 0) FROM mongodb.dashboardDB.dashboardData);
Now, we have the data in our data lakehouse. While we could choose not to move the data and operate with the data directly from MongoDB, we could run into competition for resources as the growing number of analytical queries compete with existing operational queries being sent to our MongoDB database. To avoid this, we can either create a data reflection, which creates a Dremio-managed materialization on your data lake that Dremio substitutes when the table is queried, or ingest the data into our data lakehouse as we did above. Either option allows analytical queries to utilize Dremio’s infinite horizontal and vertical scaling capabilities fully.
Connecting Superset to Dremio
Dremio can be used with most existing BI tools, with one-click integrations in the user interface for tools like Tableau and Power BI. We will use an open-source option in Superset for this exercise, but any BI tool would have a similar experience.
We need to initialize Superset, so open another terminal and run this command:
docker exec -it superset superset init
This may take a few minutes to finish initializing, but once it is done, you can head over to localhost:8080 and log in to Superset with the username “admin” and password “admin”. Once you are in, click on “Settings” and select “Database Connections”.
Add a New Database
Select “Other”
Use the following connection string (make sure to include Dremio username and password in URL):
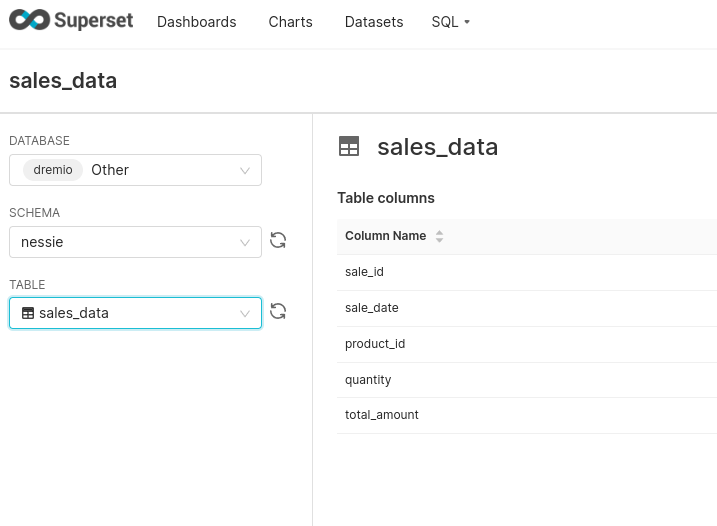
The next step is to add a dataset by clicking on the + icon in the upper right corner and selecting “create dataset”. From here, select the table you want to add to Superset, in this case our sales_data table.
We can then click the + to add charts based on the datasets we’ve added. Once we create the charts we want, we can add them to a dashboard, and that’s it! You’ve now taken data from an operational database, ingested it into your data lake, and served a BI dashboard using the data.
Ingesting Data Into Apache Iceberg Tables with Dremio: A Unified Path to Iceberg
By unifying data from diverse sources, simplifying data operations, and providing powerful tools for data management, Dremio stands out as a comprehensive solution for modern data needs. Whether you are a data engineer, business analyst, or data scientist, harnessing the combined power of Dremio and Apache Iceberg will undoubtedly be a valuable asset in your data management toolkit.
Sep 22, 2023·Dremio Blog: Open Data Insights
Intro to Dremio, Nessie, and Apache Iceberg on Your Laptop
We're always looking for ways to better handle and save money on our data. That's why the "data lakehouse" is becoming so popular. It offers a mix of the flexibility of data lakes and the ease of use and performance of data warehouses. The goal? Make data handling easier and cheaper. So, how do we […]
Oct 12, 2023·Product Insights from the Dremio Blog
Table-Driven Access Policies Using Subqueries
This blog helps you learn about table-driven access policies in Dremio Cloud and Dremio Software v24.1+.