25 minute read · September 27, 2021
Project Nessie: Transactional Catalog for Data Lakes with Git-like semantics

· Director, Developer Relations, Dremio
Recent innovations in the data lake have streamlined how data is managed, opening up new ways for data engineers to collect, validate, process and prepare high-quality data for real-time analytics. In 2010 Hive’s concept of tables grouped related files together in a systematic way. But recently, the introduction of table formats by projects like Apache Iceberg and Delta Lake greatly improved metadata organization in order to offer significant performance improvements and atomic table transactions.
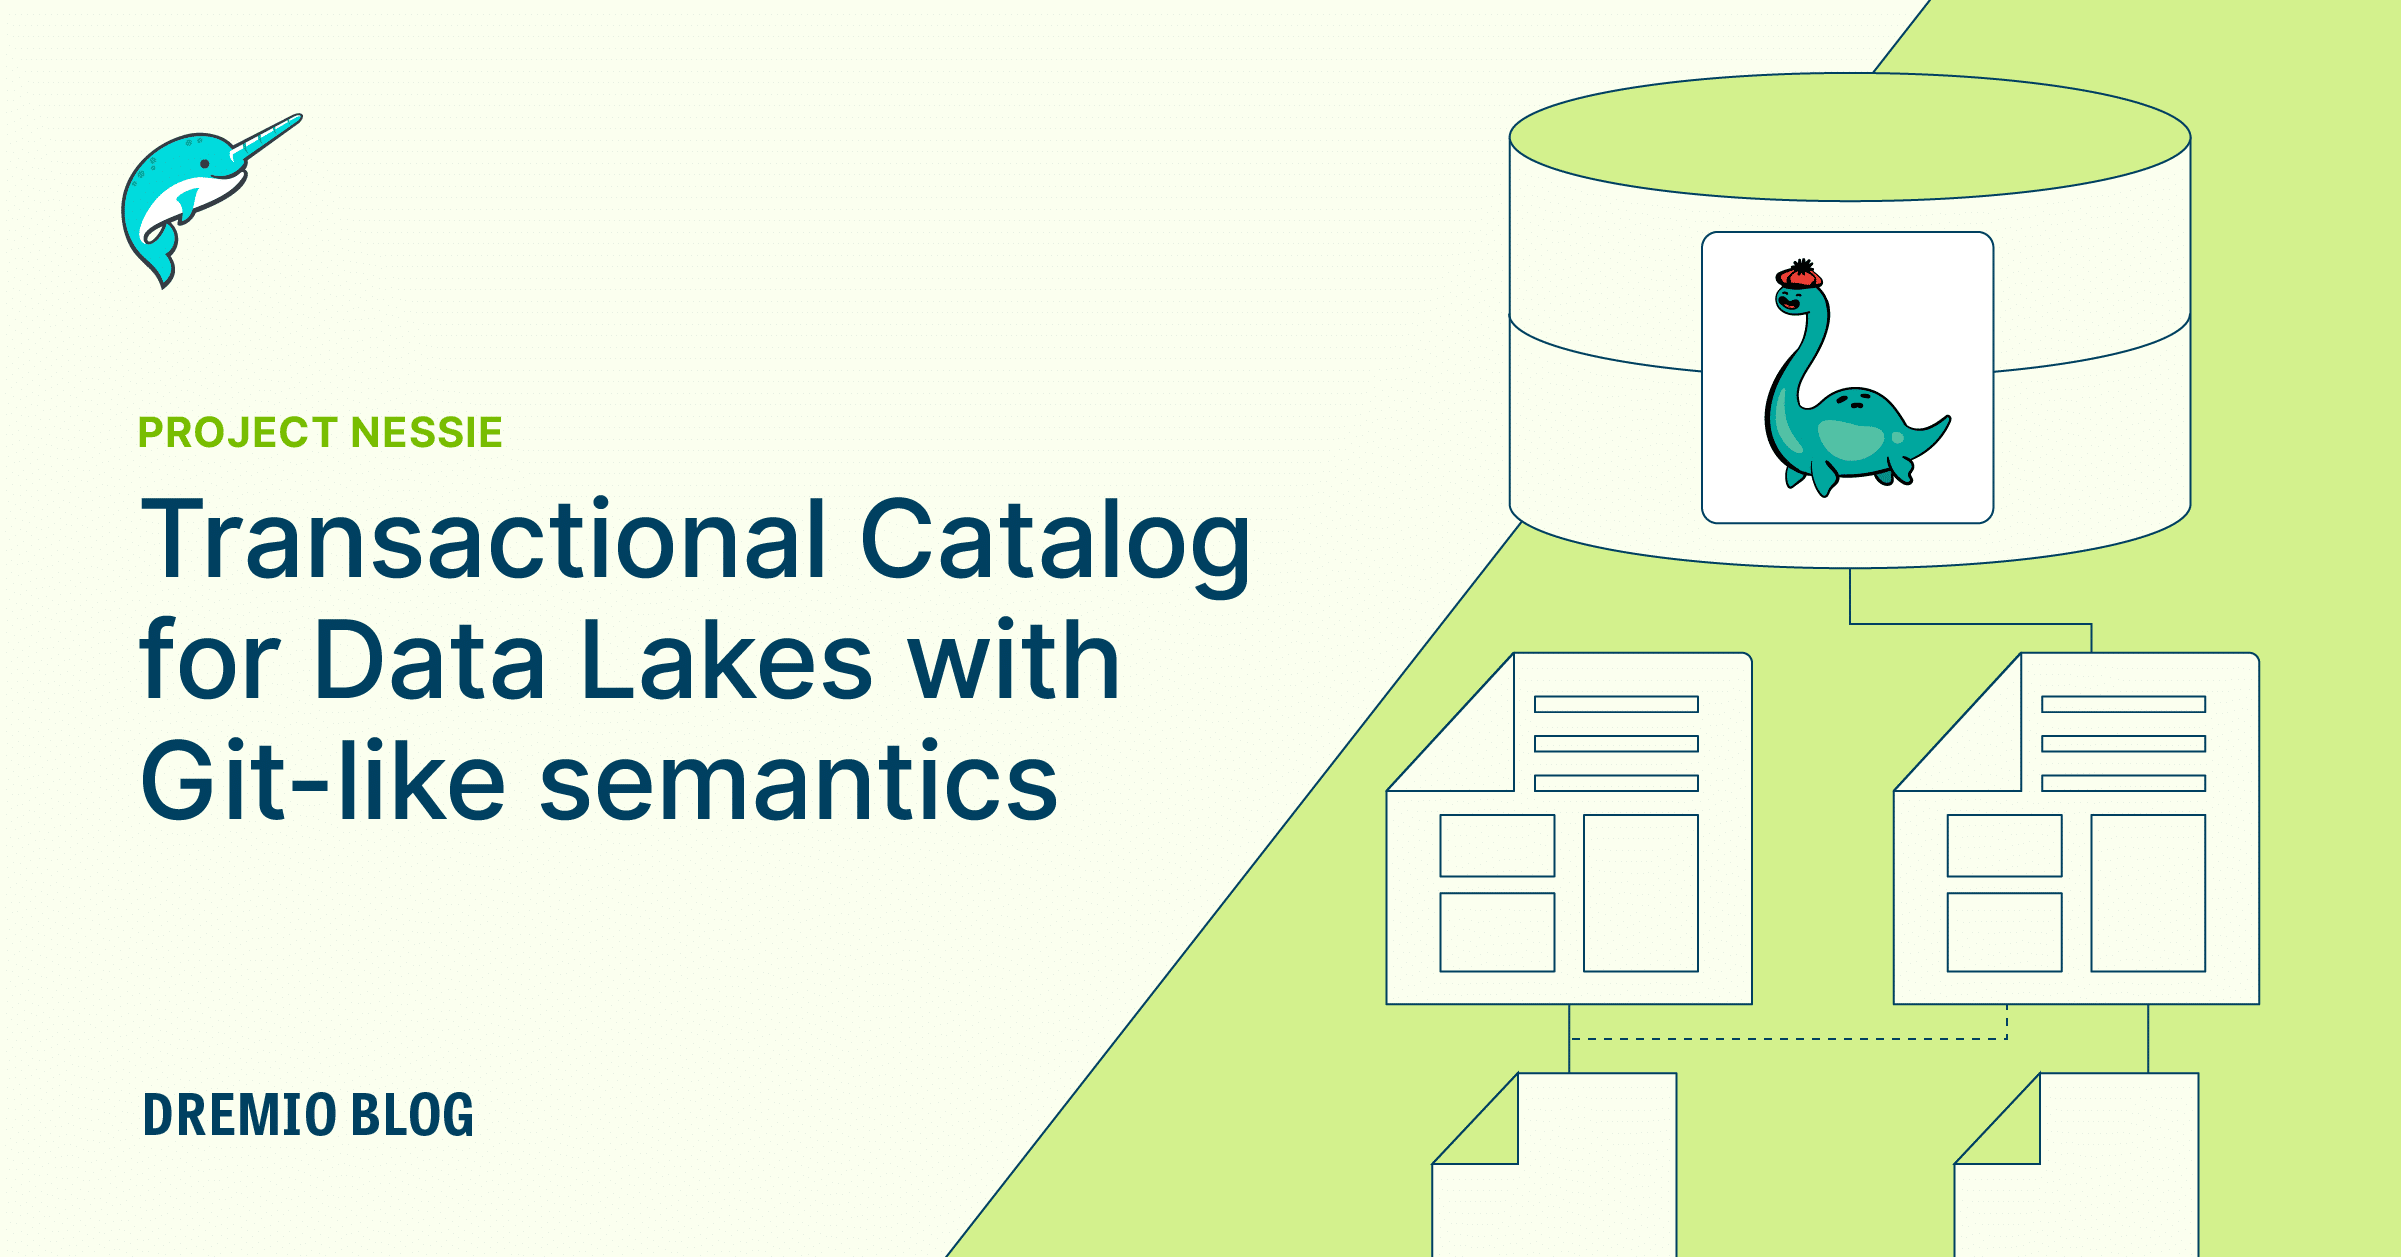
Building upon this foundation, Project Nessie, an open source project, introduces Git-inspired branching and version control which enables data engineers to streamline the flow of data into the data lake. Data engineers can use ETL branches to transform and enrich data, and then merge them into their production branch in a consistent way, thereby taking control of an often messy process. In this article, we’ll explain what Project Nessie is, how it works with table formats, how Nessie is Git-like, and why data engineers benefit from this technique whether they ETL, ELT or stream data into their data lake.
Table formats and metadata files
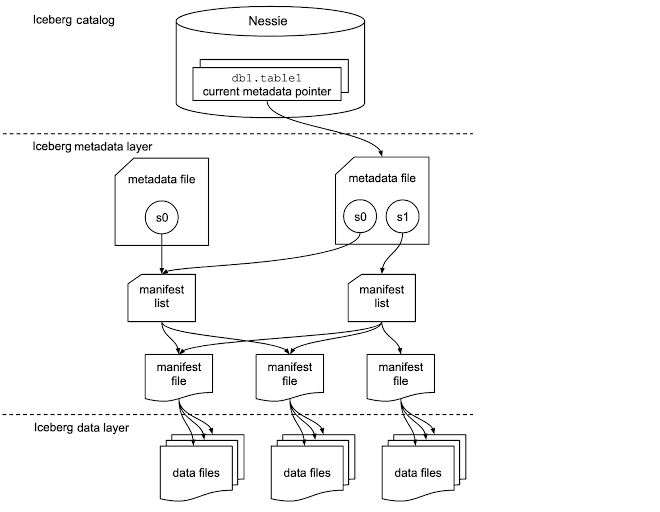
A table format is a specification, such as Apache Iceberg, that provides an abstraction of data into a more familiar tabular format. It enables users to interact with a table’s underlying data without having to figure out it’s layout. Specifically, when a data lake engine or tool wants to read data from a table, it needs to know the structure of the table and where that table's data is. That information is stored in a table’s metadata file and related files (see Figure 1).
In Iceberg and Delta Lake, each table’s metadata file, and related files, store all of the information about a table such as it’s schema, partition information and the names of the data files. Each version of the table is called a table snapshot. With the consolidation of all of this information into one set of related files, data engineers no longer have to think about where a Parquet (or Avro, etc.) file lives, how big the file is, whether or not it has the same schema as other files, is it in the right directory so it will get picked up for partitioning, etc. This saves the data engineer a lot of time and needless frustration.
Some of the functionality that these table formats provide include:
- ACID-compliant record-level data mutations with SQL DML
- Instant schema and partition evolution
- Automatic Partitioning
- Time travel to query an older table snapshot
All they need is an engine or tool that knows how to find each table’s metadata file, and how to use it.
Metadata catalog
But how do you know where the metadata files live? In Iceberg, the pointer to each metadata file is referred to as the ‘current metadata pointer’. In Figure 1, the current metadata pointer for the table named ‘db1.table1’ points to the metadata file on the right. And the place you go to find the location of the current metadata pointer is called a metadata catalog. In contrast to Hive, Iceberg & Delta Lake support multiple different data catalog types. They both give you the option to choose a catalog, such as Hive Metastore or Nessie.
Atomic operations
The primary requirement for a metadata catalog is that it must support atomic operations for updating the current metadata pointer. This is what allows operations on tables to be atomic and guarantee correctness. Anytime Iceberg or Delta Lake update a data file (i.e. update a table via insert, update, delete or upsert), then a new manifest file, manifest list and metadata file are created (see Figure 1). Once the data file and metadata files are committed, the metadata catalog updates the current metadata pointer to point to the new metadata file in an atomic operation. The result is streamlined data management with significant performance improvements and atomic table transactions.
Note
You can learn more about the components of the Iceberg table, such as the snapshot, manifest list, manifest file, and data files in the Iceberg Catalog section of “Apache Iceberg: An Architectural Look Under the Covers.
Multi-table transactions
Unlike most Iceberg catalogs such as Hive Metastore, Nessie can do a lot more than update multiple tables' current metadata pointers. It can track changes to copies of tables used for ETL as well as versions of them which can be used to merge them back into the original tables as part of an incremental ETL process.
Early data lakes were optimized for quickly storing and querying large datasets, but not for record level changes. Changes to a table could require updating many large files in multiple directories which would take time. With the possibility of incomplete file updates and multiple tools operating on the same data, there was no guarantee of data consistency or a standardized way to undo mistakes. But now new table formats, such as Iceberg and Delta Lake with atomic table operations, open the door to new possibilities.
A New Hope
These new operations inspired the developers of Nessie to ask “How could we design a data lake for data engineers so they can reuse each other's assets?" Would they center the design around individual RDBMS transactions that application developers require, or would they create an application level design backed by a modern source control system that enables workloads beyond OLTP such as ETL? Why not have both?
While atomic table operations are exciting, they are limited to just one table. They enable simple, single table-level inserts, updates, upserts and deletes, but that’s where the transactions end. This traditional way is handicapped in the following ways:
- Data loaded into a temporary table on the data lake risks being exposed to production, or worse, overwriting production data.
- Your data CI/CD process is not automated in the same way as your application code
- You do not have version control to merge your changes into production with atomic transactions across your data so that all of the changes are committed at once, or none of them are committed at all.
- You do not have an ‘undo’ button to roll back changes if a human error occurs, or to roll-back data after a data trial. Related changes to multiple tables are disconnected.
So, if there were a way to perform bulk updates and multi-table transactions, isolated from production, in a consistent process, where should that functionality reside? As a metadata catalog, Nessie already supports atomic operations to update multiple current metadata pointers for Iceberg and Delta Lake, so it makes sense to extend Nessie to include this functionality as well. And that’s just what the developers of Nessie have done.
The Nessie approach
Project Nessie is to data lakes what Git is to source code. It adds Git-like semantics to Iceberg tables, Delta Lake tables and SQL views so that development, staging and production environments can utilize the same data lake without running the risk of contaminating production data. Using Git-like commands such as ‘commit’, Nessie eliminates the hard and often manual work required to manage and keep track of data on the data lake as it moves through the ETL process without requiring prior knowledge of Git or data lakes. Nessie does this with its branching functionality to track changes to multiple copies of the same data, and version control to track these changes over time so they can be merged back into production safely, consistent and atomically.
This approach is much more aligned with how data engineers work and how the real world operates. In the real world, there might be multiple sessions, multiple users and multiple services or engines that are operating on the same data. In these two examples, you can see the difference between a system built for application developers and one built for data engineers.

Nessie also makes sure there is never a need for a data engineer to work on data in production in an inconsistent way. This way data analysts and data scientists will never see inconsistent data.

Furthermore, if there ever is a problem, Nessie provides an ‘undo button’, with the ability to undo a merge, so data engineers can undo human error. With Nessie, data engineers can go back in time to roll-back the last few changes, so they will be less likely to be stuck working all night or over the weekend to fix some data that has been left in a bad state.
And since these files and processes look like the tree structure and process of a Git repository, the Nessie developers chose a Git-like model to work with.
What does Git-like mean?
Nessie is Git-like because it isn’t actually using Git under the hood (that would be orders of magnitude too slow in terms of transactions per second), and it doesn’t have some of the more complicated features, such as pulling out of stashes trying to apply different merges. But it does use similar terms and concepts that Git users are familiar with and use everyday, such as:
Commit - A transaction affecting one or more tables/views. It may take place over a short or long period of time. Examples include:
- Updating one or more tables via an insert, update, upsert or delete
- Updating the definition of a view
- Updating the schema of a table
Branch - An ordered list of commits. Always a linear history. Has a name (e.g. main, etl, experiment, etc.)
- By default all operations happen on the ‘main’ branch.
- Changes to other branches require the branch to be explicitly identified.
Tag - The same as a branch but cannot be committed to (eg EOY-2020, EOD-20210412)
- An ‘immutable’ branch. It points to a specific state and time of the Nessie database
Merge/Cherry-pick - A way to move commits from one branch to another. See Transplanting/Cherry-pick for more details.
- Make changes from one branch visible to users of another branch
How does Nessie Work with Iceberg?
Rather than trying to manage table data files directly, Nessie leverages and extends modern data formats like Iceberg and Delta Lake. This way, Nessie doesn’t need to manage copies of the data files themselves. Instead, it manages versions of the metadata file. For example, the Iceberg table metadata file is version controlled by Nessie, but not the individual Paquet data files (see Figure 1). By versioning the table metadata files, Nessie knows which versions of data files are currently referenced and must be tracked, as well as which versions are no longer needed and can be safely deleted.
Loading data with Nessie & Iceberg
Let’s take a look at how branching can be used to load data onto a couple of tables using the Nessie Python API, Apache Spark and Apache Iceberg.
First, we initialize with PySpark and PyNessie to create a Spark session. Once all dependencies are configured, we can load our data into Nessie with the following steps:
- Create a new branch named dev
- List all branches
It is worth mentioning that we don't have to explicitly create a main branch, since it's the default branch.
spark.sql("CREATE BRANCH dev IN nba_catalog AS main").toPandas()We create the dev branch. Note that the auto created main branch already exists, and the main and dev branches both point to the same hash.

spark.sql("LIST REFERENCES IN nba_catalog").toPandas()
refType  name  hash
Branch   main  2e1cfa82b035c26cbbbdae632cea070514eb8b773f616a26cbbbdae632cea070
Branch   dev   2e1cfa82b035c26cbbbdae632cea070514eb8b773f616a26cbbbdae632cea070
Once we create the dev branch and verify that it exists, we can use create Iceberg tables and add data to them.
Let's create two tables in the dev branch:
- salaries
- totals_stats
To add data we:
- Switch our branch context to dev
spark.sql("USE REFERENCE dev IN nba_catalog")2. Use Iceberg to create the tables and ingest the data into dev
# Creating `salaries` table
spark.sql("""CREATE TABLE IF NOT EXISTS nba_catalog.nba.salaries (Season STRING, Team STRING, Salary STRING, Player STRING) USING iceberg""");
spark.sql("""CREATE OR REPLACE TEMPORARY VIEW salaries_table USING csv
            OPTIONS (path "/datasets/nba/salaries.csv", header true)""");
spark.sql('INSERT INTO nba_catalog.nba.salaries SELECT * FROM salaries_table');
# Creating `totals_stats` table
spark.sql("""CREATE TABLE IF NOT EXISTS nba_catalog.nba.totals_stats (
            Season STRING, Age STRING, Team STRING, ORB STRING, DRB STRING, TRB STRING, AST STRING, STL STRING,
            BLK STRING, TOV STRING, PTS STRING, Player STRING, RSorPO STRING)
            USING iceberg""")
spark.sql("""CREATE OR REPLACE TEMPORARY VIEW stats_table USING csv
            OPTIONS (path "/datasets/nba/totals_stats.csv", header true)""")
spark.sql('INSERT INTO nba_catalog.nba.totals_stats SELECT * FROM stats_table').toPandas()
Next we verify the data was added successfully by confirming the number of rows of data in the csv files and the tables are the same. Note we use the table@branch notation which overrides the context set by a USE REFERENCE command.
table_count = spark.sql("select count(*) from nba_catalog.nba.`salaries@dev`").toPandas().values[0][0]
csv_count = spark.sql("select count(*) from salaries_table").toPandas().values[0][0]
assert table_count == csv_count
print(table_count)50table_count = spark.sql("select count(*) from nba_catalog.nba.`totals_stats@dev`").toPandas().values[0][0]
csv_count = spark.sql("select count(*) from stats_table").toPandas().values[0][0]
assert table_count == csv_count
print(table_count)92So far we have only worked on the ‘dev’ branch, where we created 2 tables and added some data. The ‘main’ branch has remained untouched.
spark.sql("USE REFERENCE main IN nba_catalog").toPandas()We can also verify that the ‘dev’ and ‘main’ branches point to different commits.
spark.sql("LIST REFERENCES IN nba_catalog").toPandas()refType name hash
Branch main 2e1cfa82b035c26cbbbdae632cea070514eb8b773f616a26cbbbdae632cea070
Branch dev f9c0916bc99df061d71d9a5b9a8e7c7e5510d3885fa00bbbdcea07b7738ae632Once we complete our changes to the dev branch, we can merge them into main. We merge dev into main via the merge command.
spark.sql("MERGE BRANCH dev INTO main IN nba_catalog").toPandas()
We can verify the branches have the same hash and that ‘main’ contains the expected tables.
spark.sql("USE REFERENCE main IN nba_catalog").toPandas()
spark.sql("SHOW TABLES IN nba_catalog").toPandas()
namespace tableName
nba salaries
nba totals_statsThe dev branch is merged into the main branch and ready to be used by data analysts. All users of the main branch will see both tables as if they were created in one transaction. In other words, all tables and rows will appear or none of them will appear.
Let’s clean up the ‘dev’ branch now that we have merged into ‘main’.
spark.sql("DROP BRANCH dev IN dev_catalog")Incremental ETL with Nessie & Iceberg
Now that we know how to load a simple table, let’s create an ETL workflow. In this example we will extract just changes from the csv file, transform the table by adding a new column, and then incrementally load new records into the two NBA tables.
First we will create a branch called etl.
spark.sql("CREATE BRANCH etl IN nba_catalog AS main").toPandas()spark.sql("LIST REFERENCES IN nba_catalog").toPandas()refType name hash
Branch etl ec4d18bb08853ab496251b52c6692ef5b4650a07cf973faaeaf668e2f0ba82b0
Branch main 5b65dc0cf60138195393722ee6c409c56ad655844ac6ede1cfa82b035c26c2ceNow we switch to the etl branch before changing the schema of the salaries table.
spark.sql("USE REFERENCE etl IN nba_catalog").toPandas()We add the column ‘JerseyNo’ to the salaries table.
spark.sql("ALTER TABLE nba_catalog.nba.salaries ADD COLUMN JerseyNo String").toPandas()Season Team Salary Player JerseyNo
2017-18 Golden State Warriors $25000000 Kevin Durant None
2018-19 Golden State Warriors $30000000 Kevin Durant None
...We can see that the new column JerseyNo has been added to the salaries table.
Let’s validate that the `main` branch still points to the previous hash and does not have the JeryseyNo column in the salaries table.
spark.sql("select * from nba_catalog.nba.`salaries@main`").toPandas()Season Team Salary Player
2017-18 Golden State Warriors $25000000 Kevin DurantNow let’s update and insert a few records in the salaries table. We’ll add two new rows and update two existing rows of the salaries table.
spark.sql("""CREATE OR REPLACE TEMPORARY VIEW salaries_updates USING csv
            OPTIONS (path "../datasets/nba/salaries-updates.csv", header true)""")
spark.sql('''MERGE INTO nba_catalog.nba.salaries as salaries
USING salaries_updates
ON salaries.Player = salaries_updates.Player and salaries.Season = salaries_updates.es
WHEN MATCHED THEN
UPDATE SET salaries.Team = salaries_updates.Team, salaries.Salary = salaries_updates.Salary
WHEN NOT MATCHED
THEN INSERT (Season, Team, Salary, Player, JerseyNo) VALUES (Season, Team, Salary, Player, JerseyNo)''')
table_count = spark.sql("select count(*) from nba_catalog.nba.salaries").toPandas().values[0][0]
print(table_count)52Now that we are happy with the data we can again merge it into ‘main’
spark.sql("MERGE BRANCH etl INTO main IN nba_catalog").toPandas()name hash
main a7d2dd3dfb6c53d6343f97e0ed1a85f5844f0207dee18faf668e2f0be8cbbfa8Now let’s verify that the changes exist on the `main` branch and that the `main` and `etl` branches have the same hash
spark.sql("LIST REFERENCES IN nba_catalog").toPandas()refType name hash
Branch etl a7d2dd3dfb6c53d6343f97e0ed1a85f5844f0207dee18faf668e2f0be8cbbfa8
Branch main a7d2dd3dfb6c53d6343f97e0ed1a85f5844f0207dee18faf668e2f0be8cbbfa8
Learn More
To learn more about Project Nessie, visit the following:
- Nessie Demos: https://github.com/projectnessie/nessie-demos
- Project Website: https://projectnessie.org
- Git Repository: https://github.com/projectnessie/nessie
- More articles & videos: https://www.dremio.com/subsurface/nessie-project/
